Using The Modeling API
This tutorial is a step-by-step walkthrough that demonstrates how to use our design API (KittyCAD) to design a cube and take a snapshot of it for you to view. This tutorial will be using Python, but you can use any language that supports websockets. If you would like to download the full code as a reference, you can download it here.
References
While you follow this tutorial, feel free to reference our API Docs or our Python Library.
Prerequisites
For this tutorial, you will need to download Python. Make sure to download the correct version for your operating system.
Generate an API Token
For any API call, you have to have a Zoo API token. Click here to navigate to your account page to generate an API token. Once you have your API token, you will use that token for your API calls. If you have multiple API tokens, it does not matter which one you use. Do not share your API token with anyone.
Using the Python KittyCAD Library
To use the KittyCAD API for this tutorial, you will need to install the KittyCAD Python library. You can do this by running the following command in your terminal:
pip3 install kittycad
You can also navigate here and download it from the PyPl website.
Setting up the Virtual Environment
Virtual environments are a way to isolate your Python environment from your system's Python environment. This is useful for when you are working on multiple projects that require different versions of Python or different libraries. It is a good practice if you are working on multiple Python projects. To create a virtual environment, run the following command in your terminal:
pip3 install virtualenv
python3 -m venv venv
source venv/bin/activate
This will create a virtual environment in the venv directory and activate it.
Setting your API Token as an Environment Variable
To use your API token, you will need to set it as an environment variable. Without it, you will not be able to call any API endpoints. To do this, run the following command in your terminal (replace <your-api-token> with your API token):
export KITTYCAD_API_TOKEN=<your-api-token>
Creating The Python Script
We are going to build each section in detail and build the Python script piece by piece.
Helpful Libraries
First, we are going to import some helpful libraries that we will use throughout the tutorial.
import json
import os
import uuid
json- This is a built-in Python library that allows us to work with JSON data.os- This is a built-in Python library that allows us to work with the operating system.uuid- This is a built-in Python library that allows us to generate UUIDs.
Client Setup
In order to use our Python Library, we need to authenticate with the KittyCAD API. First, we are going to import the client into Python
from kittycad.client import ClientFromEnv
All Imports
If you would like to reference our standard library, you can reference it here.
None of the following imports are required, but they are very helpful for avoiding typos and making sure that you are using the correct types.
from kittycad.api.modeling import modeling_commands_ws
from kittycad.models import (
    ImageFormat,
    ModelingCmd,
    ModelingCmdId,
    WebSocketRequest,
)
from kittycad.models.path_segment import PathSegment, line
from kittycad.models.modeling_cmd import (
    default_camera_look_at,
    start_path,
    take_snapshot,
    extend_path,
    move_path_pen,
    extrude,
    close_path,
)
from kittycad.models.web_socket_request import modeling_cmd_req
Designing a Cube
To start designing a cube, let's make a function called make_cube(). We will start by calling the client, creating a UUID for our sketch, and opening the websocket.
def make_cube():
    # Create the client.
    client = ClientFromEnv()

    # Create a unique id for the sketch path.
    sketch_path_id = uuid.uuid4()

    # Connect to the websocket.
    with modeling_commands_ws.WebSocket(
        client=client,
        fps=30,
        unlocked_framerate=False,
        video_res_height=360,
        video_res_width=480,
        webrtc=False,
    ) as websocket:
Next, we will start to draw a square on a sketch. So in the next section, we will be:
- Creating a sketch
- Moving the pen to the bottom left corner
- Drawing a path to the right, up, left.
- Closing the sketch.
Drawing the Square
First, let's start the path. All of the modeling commands take two parameters at the top level.
cmd- This is the command that you want to run (start_path, take_snapshot, etc.)cmd_id- This is the ID of the command. This is used to identify the command when you receive a response from the server. The ID we will use is a UUID. This is helpful for referencing th ecommand later on.
(continued from before)
    # Start the Path
        websocket.send(WebSocketRequest(
            modeling_cmd_req(cmd=ModelingCmd(start_path()), cmd_id=ModelingCmdId(sketch_path_id)),
        ))
Now that we have started the path, let's draw the square. Our first modeling command will be to move the pen, then start drawing the square starting from the bottom-left corner.
# continued from previous code snippet.

        # Move the pen to the bottom left corner.
        websocket.send(WebSocketRequest(
            modeling_cmd_req(
                cmd=ModelingCmd(
                    move_path_pen(
                        path=str(sketch_path_id),
                        to={
                            "x": -5,
                            "y": -5,
                            "z": 0,
                        }
                    )
                ),
                cmd_id=ModelingCmdId(uuid.uuid4())))) # Create a new UUID for this command.

        # The next three websocket.send blocks are drawing the line to the right, up, and then to the left.
        websocket.send(WebSocketRequest(
            modeling_cmd_req(
                cmd=ModelingCmd(
                    extend_path(
                        path=str(sketch_path_id),
                        segment=line(
                            end={
                                "x": 10,
                                "y": 0,
                                "z": 0,
                            },
                            relative=True, # This means that the line is relative to the current position of the pen.
                        )
                    )),
                cmd_id=ModelingCmdId(uuid.uuid4())
            )
        ))

        websocket.send(WebSocketRequest(
            modeling_cmd_req(
                cmd=ModelingCmd(
                    extend_path(
                        path=str(sketch_path_id),
                        segment=line(
                            end={
                                "x": 0,
                                "y": 10,
                                "z": 0,
                            },
                            relative=True,
                        )
                    )),
                cmd_id=ModelingCmdId(uuid.uuid4())
            )
        ))

        websocket.send(WebSocketRequest(
            modeling_cmd_req(
                cmd=ModelingCmd(
                    extend_path(
                        path=str(sketch_path_id),
                        segment=line(
                            end={
                                "x": -10,
                                "y": 0,
                                "z": 0,
                            },
                            relative=True,
                        )
                    )),
                cmd_id=ModelingCmdId(uuid.uuid4())
            )
        ))

        # Now, close the path.

        # Close the sketch
        websocket.send(WebSocketRequest(
            modeling_cmd_req(
                cmd=ModelingCmd(
                    close_path(
                        path_id=ModelingCmdId(sketch_path_id) # Notice that we need to provide the sketch path UUID we created in the beginning.
                    )
                ),
                cmd_id=ModelingCmdId(uuid.uuid4())
            )
        ))
We have now drawn a square. Now, let's extrude the square into a cube. To do this, we will use the modeling command extrude. This command takes three required parameters:
- cap - This is a boolean that determines whether or not to cap the extrusion.
- distance - This is the distance to extrude the sketch.
- target - This is the target sketch to extrude.
# continued from previous code snippet.

        # Extrude the sketch.
        websocket.send(WebSocketRequest(
            modeling_cmd_req(
                cmd=ModelingCmd(
                    extrude(
                        cap=True,
                        distance=10,
                        target=ModelingCmdId(sketch_path_id),
                    )
                ),
                cmd_id=ModelingCmdId(uuid.uuid4())
            )
        ))
We have now extruded the sqaure into a cube. Before we take a snapshot, let's get back the messages from the server. To do this, we will use the recv() method on the websocket. This will return a WebSocketResponse object. This isn't necessary, but it is helpful to see what the server is sending back to us.
# Get the messages.
        while True:
                message = websocket.recv()
                print(json.dumps(message.model_dump_json(), indent=4, sort_keys=True))
                break
Taking a Snapshot
Lastly, we are going to orient the camera and take a snapshot of the cube we just made. To do this, we will use the default_camera_look_at and the take_snapshot modeling command. default_camera_look_at takes three required parameters:
- center - This is the center of what the camera is looking at.
- up - This is the up vector of the camera.
- vantage - This is where the camera is placed.
take_snapshot takes one required parameter:
- Format - This is the format of the image. This can be either
pngorjpeg.
# continued from previous code snippet.

        # Orient the camera.
        websocket.send(WebSocketRequest(
            modeling_cmd_req(
                cmd=ModelingCmd(default_camera_look_at(
                    center = {"x": 0, "y": 0, "z": 0},
                    up = {"x": 0, "y": 0, "z": 1},
                    vantage = {"x": 20, "y": 20, "z": 20},
                )),
                cmd_id=ModelingCmdId(uuid.uuid4())
            )
        ))

        # Take a snapshot.
        websocket.send(WebSocketRequest(
            modeling_cmd_req(
                cmd=ModelingCmd(take_snapshot(format=ImageFormat.PNG)),
                cmd_id=ModelingCmdId(uuid.uuid4())
            )
        ))
Now, let's write the contents of the snapshot to a file. To do this, we will use the write() method on the WebSocketResponse object. This will write the contents of the snapshot to a file. We will also close the websocket. First, we will search through the messages and find the one whos type matches "take_snapshot". Once found, we will write the contents of the snapshot to a file. This will save the file in the same directory as your python script.
        # Search through the websocket messages and find the one that has the snapshot.
        png_contents = b""
        for message in websocket:
            message_dict = message.model_dump()
            print(message_dict)
            if (
                message_dict["resp"]["data"]["modeling_response"]["type"] == "take_snapshot"
            ):
                png_contents = message_dict["resp"]["data"]["modeling_response"][
                    "data"
                ]["contents"].get_decoded()
                break

        # Save the contents to a file.
        dir_path = os.path.dirname(os.path.realpath(__file__))
        png_path = os.path.join(dir_path, "snapshot.png")
        print(png_path)
        with open(png_path, "wb") as f:
            f.write(png_contents)

        # Ensure the file is not empty.
        assert len(png_contents) > 0

        # Ensure the file exists.
        assert os.path.exists(png_path)
You should now have a snapshot.png file that displays your cube! Your image should look like like this:
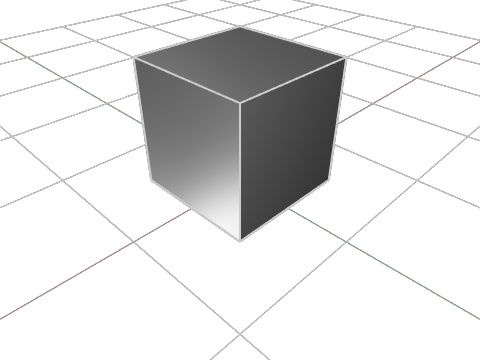
Congrats! You have now created a cube using the KittyCAD Modeling API! If you'd like access to the full code, you can copy it below.
Full Code
import json
import os
import uuid

from kittycad.api.modeling import modeling_commands_ws
from kittycad.client import ClientFromEnv
from kittycad.models import ImageFormat, ModelingCmd, ModelingCmdId, WebSocketRequest
from kittycad.models.modeling_cmd import (
    close_path,
    default_camera_look_at,
    extend_path,
    extrude,
    move_path_pen,
    start_path,
    take_snapshot,
)
from kittycad.models.path_segment import line
from kittycad.models.web_socket_request import modeling_cmd_req


def make_cube():

    # Create our client.
    client = ClientFromEnv()

    # Create a unique id for the sketch path.
    sketch_path_id = uuid.uuid4()

    # Connect to the websocket.
    with modeling_commands_ws.WebSocket(
        client=client,
        fps=30,
        unlocked_framerate=False,
        video_res_height=360,
        video_res_width=480,
        webrtc=False,
    ) as websocket:

        # Draw a sqaure

        # Start the Path
        websocket.send(
            WebSocketRequest(
                modeling_cmd_req(
                    cmd=ModelingCmd(start_path()), cmd_id=ModelingCmdId(sketch_path_id)
                ),
            )
        )

        websocket.send(
            WebSocketRequest(
                modeling_cmd_req(
                    cmd=ModelingCmd(
                        move_path_pen(
                            path=str(sketch_path_id),
                            to={
                                "x": -5,
                                "y": -5,
                                "z": 0,
                            },
                        )
                    ),
                    cmd_id=ModelingCmdId(uuid.uuid4()),
                )
            )
        )

        websocket.send(
            WebSocketRequest(
                modeling_cmd_req(
                    cmd=ModelingCmd(
                        extend_path(
                            path=str(sketch_path_id),
                            segment=line(
                                end={
                                    "x": 10,
                                    "y": 0,
                                    "z": 0,
                                },
                                relative=True,
                            ),
                        )
                    ),
                    cmd_id=ModelingCmdId(uuid.uuid4()),
                )
            )
        )

        websocket.send(
            WebSocketRequest(
                modeling_cmd_req(
                    cmd=ModelingCmd(
                        extend_path(
                            path=str(sketch_path_id),
                            segment=line(
                                end={
                                    "x": 0,
                                    "y": 10,
                                    "z": 0,
                                },
                                relative=True,
                            ),
                        )
                    ),
                    cmd_id=ModelingCmdId(uuid.uuid4()),
                )
            )
        )

        websocket.send(
            WebSocketRequest(
                modeling_cmd_req(
                    cmd=ModelingCmd(
                        extend_path(
                            path=str(sketch_path_id),
                            segment=line(
                                end={
                                    "x": -10,
                                    "y": 0,
                                    "z": 0,
                                },
                                relative=True,
                            ),
                        )
                    ),
                    cmd_id=ModelingCmdId(uuid.uuid4()),
                )
            )
        )

        # Close the sketch
        websocket.send(
            WebSocketRequest(
                modeling_cmd_req(
                    cmd=ModelingCmd(close_path(path_id=ModelingCmdId(sketch_path_id))),
                    cmd_id=ModelingCmdId(uuid.uuid4()),
                )
            )
        )

        # Extrude the square into a cube
        websocket.send(
            WebSocketRequest(
                modeling_cmd_req(
                    cmd=ModelingCmd(
                        extrude(
                            cap=True,
                            distance=10,
                            target=ModelingCmdId(sketch_path_id),
                        )
                    ),
                    cmd_id=ModelingCmdId(uuid.uuid4()),
                )
            )
        )

        # Get the messages.
        while True:
            message = websocket.recv()
            print(json.dumps(message.model_dump_json(), indent=4, sort_keys=True))
            break

        # Orient the camera.
        websocket.send(
            WebSocketRequest(
                modeling_cmd_req(
                    cmd=ModelingCmd(
                        default_camera_look_at(
                            center={"x": 0, "y": 0, "z": 0},
                            up={"x": 0, "y": 0, "z": 1},
                            vantage={"x": 20, "y": 20, "z": 20},
                        )
                    ),
                    cmd_id=ModelingCmdId(uuid.uuid4()),
                )
            )
        )

        # Take a snapshot.
        websocket.send(
            WebSocketRequest(
                modeling_cmd_req(
                    cmd=ModelingCmd(take_snapshot(format=ImageFormat.PNG)),
                    cmd_id=ModelingCmdId(uuid.uuid4()),
                )
            )
        )

        png_contents = b""
        for message in websocket:
            message_dict = message.model_dump()
            print(message_dict)
            if (
                message_dict["resp"]["data"]["modeling_response"]["type"]
                == "take_snapshot"
            ):
                png_contents = message_dict["resp"]["data"]["modeling_response"][
                    "data"
                ]["contents"].get_decoded()
                break

        # Save the contents to a file.
        dir_path = os.path.dirname(os.path.realpath(__file__))
        png_path = os.path.join(dir_path, "snapshot.png")
        print(png_path)
        with open(png_path, "wb") as f:
            f.write(png_contents)

        # Ensure the file is not empty.
        assert len(png_contents) > 0

        # Ensure the file exists.
        assert os.path.exists(png_path)


make_cube()